Saturday, November 27, 2010

a plush rat treehouse

My my, how time and crafts fly! There have been a few crafts that shall remain undocumented that include a very cool bird mobile - as soon as i figure out how to make the top I shall upload a picture of the completed project.

This project has evolved from the loss of one of our pet rats. There now remains a fit young male rat named Mister Morrison Jacket, and a happy but tumor ridden, Cornflake aka Miss Fatty Fat Fat. Due to Cornflakes continued increase in age I decided to create a comfortable plush environment for her retirement years. This along with a love for Zelda allowed the design of Link's Treehouse.

Due to its apparent unique idea I had to create the design myself which means as you read you may pick up on improvements or ideas to make it quicker...

I would love to hear for the next time i make one! Enjoy!!


my ingredients:
needle, thread and knowledge of a blanket stitch
two curtain sample material offcuts (fairly regular item at most opshops)
one old curtain (used due to green colour)
round metal hanging thing
stuffing from old pillow
wool


measure and cut two
pieces of material depe
ndant on how tall you want your trunk.

mine is 29 x 23 cm

place them inside out and stitch together leaving a hands width free at one end

i used a blanket stitch


turn inside out

and stuff


sew through both sides back and forth at desired intervals

i used 10 cm


the night i made the base of tree or top of the trunk, brit was jamming with her mate in the lounge so before i knew it i was finished and i hadn't photographed a thing... whoops

anywho i cut a circle 23 centimeters across
sew inside out but leave half open
turn right side out
insert two cut out cardboard circles
stuff and close gap


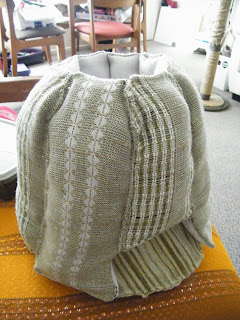
now i actually didn't measure this part however they are around 26 x 10 cm

and there are 7.5 of them

sew inside out leaving the bottom unstitched

squash overnight.


sew the sides together


then stuff
then sew onto the base


take some time to ponder the following options
- attach trunk to tree
- standing or handing

i decided on unattached and hung with
finger-knitted wool


they like it all right!

Thursday, July 22, 2010

and here it is!!

Happy sewing and make sure your imagination is not limited by the words or pictures!!

I however am taking the weekend off crafty stuff and heading to the snow!

Be Well

Wednesday, July 21, 2010


Two more sock buddies made with the intent to give one to my soon to be created nephew!

Now to pick the Opera Singing Zebra or the Owl Angel (he has poorly developed wings).

I'm waiting for a massive email to arrive and once it has I shall upload instructions so you can make your own!

Be Well!

Tuesday, July 6, 2010

You are not going to believe how simple this was, once I figured out the key of refurnishing...

dont take off the old one!!

The chair gets more comfortable and you save alot of time and effort trying to remove the staples.

also make sure the new material doesn't cover where you screw it back on or your asking for trouble!

So in conclusion:
1. unscrew the seat and sit on material
(my op shop is selling material samples which are the perfect size for my seats!)
2. staple around the edges and trim excess material.
3. screw seat back on and enjoy!

Sunday, July 4, 2010

So you have an old pillow and the case is shot but just as your throwing it away you realise that theres a zip... and the pillow inside is perfect!

So you get two pieces of material, match it to the size of the old case or make one larger if you want a flap like mine. Sew inside out and reverse when complete. Cut some button holes, use thread to make sure the edges doesn't fray and add additional decorative buttons and voila!

I used material left over from ted's dreads and mother provided the buttons so this case was technically free! sweetness.

Friday, July 2, 2010


So it's been a couple of months, six in fact, since I first set eyes on three little alien magnets from Toy Story.

I spent a month after that in and out of all sorts of American stores looking for some and then upon arriving home, awaited for Toy Story 3 to come out in New Zealand and hoped that there would be magnets brought out here as well!

there weren't.

But you know what there were stickers..
and I have magnet strip.

So these are my very new, very cheap, Toy Story magnets!
Todays craft is updating the old, i mean why buy new gloves when you can add buttons to your old ones!!

They are actually colourful buttons... though you wouldn't think it from this picture! I might take a better one tomorrow but I probably wont.

I spent the morning following around my niece, proceeded to spend the afternoon following around my crazy friend and spent the evening in a theater mostly in darkness waiting for scene changes that didn't seem to change anything. However ones the scene commenced it was hard to stop laughing!

What is it with time, does 11:11 or 1:23 or 2:34 mean anything? cos I see it all the freaking time!?!

Be Well!