Wednesday, December 22, 2010

30th Birthday Dinosaur

once upon a time there was a hardworking twelve year old boy who spent one hour each week at home economics creating a plush toy dinosaur.

after slaving for an entire term it was finally complete and he chose to give this dinosaur to his favourite sister.

Then he pissed me off and i ripped its arms and legs off.

so now… eighteen years later, still holding the guilt of being the world’s worst sister i seek redemption.


Ingredients:
large amount of material
usual sewing resources
stuffing
two eye buttons
four limb buttons
guilt
one old photo


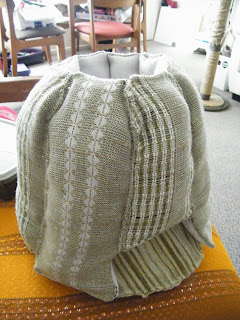
I found the only picture of me with the dinosaur and set to creating a pattern myself, after many unsuccessful internet searches.  i even contacted the school but that program doesn't exist anymore  :(


i made cardboard cutouts cos i find it easier to trace something.  Cut out, sewed inside out leaving the gap to turn it right side out again, stuffed and sew closed.  when you have two arms, two legs and one body (complete with eyes) attach them all together with the buttons


ahh i feel the guilt subsiding already!

Happy 30th Birthday David!!

Be Well!


Bird Mobile

my sister in law found this blog that had a bird mobile and hinted incredibly obviously that she wanted me to create it for her and her then developing child...  it took longer than first anticipated but its now complete.  Sorry about the lack of photo's... hadn't even created the blog when i started!

Ingredients:
lots of different material
usual sewing requirements
stuffing
sticks collected from the reserve
flax, dried or fresh
glue
LOTS of patience and ingenuity


 i had a pattern (sorry can't upload it, tried but failed) so set to crafting 10 birds


i constructed the mobile by plaiting strips of flax and using a mixture of knots and glue to attach the twigs together
  

then i sewed little pieces of flax onto the chest of the bird and tied them to the twigs
got a ring and attached it to more flax for the hanging bit and thus completed!


the birds from behind
  
and the mobile front on.

Took awhile but i'm sure it will be a loved christmas present for the newborn and his mother 

Be Well!

Home Sweet Home Decorative Sign

so i was walking along the beach quite some time ago and picked up a cool looking piece of wood which has traveled with me, unused, until today. turns out I've hand crafted a gift for every family bar one, so threw together a little home sign for them.


Ingredients:
One piece of wood
appropriate amount of black sand
wood glue
paint brush
color pencils
vivid
buttons
wooden buzzy bee
hemp or wool
frame metal round things


First i sanded the wood and mapped out a design on paper
drew the outline in pencil and vivid then brushed the inside with glue and applied sand
(this took a few goes to get it looking perfect)


I then did green edging on the letters including the outside of the sand
(not that you can really tell from this picture)
spent quite some time deciding on the button placement and style while tossing up whether to add some blue

next i plaited some hemp and tied it onto the little frame hanging things and voila!

another christmas present hits the dust or at least the wrapping paper!


Saturday, December 18, 2010

the all encompassing

i wrote this song while living in stanmore bay.  its about seeing from gods perspective and the longing i hold to strive toward the personal mentorship of an enlightened and almighty being

because when it comes down to it sense is senseless without a reason.


Be well!!

Wednesday, December 15, 2010

Organic Homemade Dandelion Tea & Coffee

It's the wrong season for uprooting dandelions (spring is best apparently) however if I keep picking the leaves we'll have enough tea to last to the next life... plus i'm keen to try dandelion coffee!

First carefully move the soil and uproot the plant

I pulled off all the leaves and separated them from the flowers.
Currently that lump of root i'm holding is soaking in a bowl in the laundry... once clean it will need to air dry on the windowsill.  Watch this space!

I separated the leaves and hung them in the window to dry.  This takes quite sometime! You know they are ready when the leaves crumple easily... the last lot i hung have been up for around 2 months and are nearly ready!

The flowers that i separated i cut into small tea like pieces and layered them individually on a tray and snap froze for an hour.  Now they are in a freezer bag ready to be added (seep for 15mins) to tea.

By freezing the flowers you keep the medicinal properties... important to me being a healer!  Otherwise just dry them!

The best part is that due to the complex nature of the dandelion plant a new one will crop up next year!  I opted to turn the spot in the garden into a natural worm farm and dig all my kitchen scraps there.  Which coincidently is also the use of the herb garden out the front which is currently decomposing the excess fruit I didn't make it to in time!

Homemade Tater Tots!!

We've all watched Napoleon Dynamite and those of us who are American may even have tried and therefore love Tater Tots.... for the average amongst us, especially those who decided to buy a massive bag of potatoes and need a way to disperse them, it's time to try them!

Ingredients:
8 medium potatoes
tablespoon of flour
pile of mushed garlic (optional)
pile of grated raw onion (optional)
pepper/salt
heaps of oil

  1. boil the potatoes with or without the skin (but do remember all the goodness is on the outside) 
  2. i spent a lot of time carefully trying to grate very hot potatoes which turned out mashed so just mash
  3. mix in everything else and anything you wish to season with
  4. grab a tablespoon full and put in your palm, cup the mixture and use your thumb and fingers of the other hand to mold into the circular tube type shape
  5. preheat the oil (if you preheat for long enough you can fill the whole room with smoke, so...)
  6. deep fry the tots, beware: they do not take long to cook AND make sure you use a metal spoon to retrieve them... turns out oil melts plastic...
  7. Cool and enjoy!!  They can be frozen so reheat in oven on 200 until desired heat and colour 
Immersing the tots with a now written off plastic spoon

Not sure what the shape is called but you can see the tots there

Those black ones were in for about 2 mins... so keep an eye on them

The cloud of smoke that filled our entire house!  wicked smell tho!


Be well!!

Homemade Recycled Cat Toys

 So it's that time of year when we hang our stockings and fill them with surprises..
I decided to get hippy and make my own toys for the cats stocking. 
I got the idea from watching a commercial where the cat is playing with a small ball of yarn...

Ingredients:
1 roll of wool left over from the blanket you never actually finished.
1 (or 3 in my case) old ball cat toys with those annoying bells in them (Britt confiscates them off the cats)
1 of those stupidly long needles which i always wondered their purpose


  Obtain old cat toy with bell enclosed.

Thread long needle with wool and pull through the holes and tie wool together


Wrap wool around the ball. I did this in opposing segments.


Once the ball is covered hold the wool with your thumb and wrap the alternative way to ensure the ball is round(ish).


Use needle to insert wool back through the holes and cut off dependent on desired usage.  I made three (one for each cat) and plan to attach one to each cat scratch and leave the third for full floor privilege (permission pending).


be well!


Saturday, November 27, 2010

a plush rat treehouse

My my, how time and crafts fly! There have been a few crafts that shall remain undocumented that include a very cool bird mobile - as soon as i figure out how to make the top I shall upload a picture of the completed project.

This project has evolved from the loss of one of our pet rats. There now remains a fit young male rat named Mister Morrison Jacket, and a happy but tumor ridden, Cornflake aka Miss Fatty Fat Fat. Due to Cornflakes continued increase in age I decided to create a comfortable plush environment for her retirement years. This along with a love for Zelda allowed the design of Link's Treehouse.

Due to its apparent unique idea I had to create the design myself which means as you read you may pick up on improvements or ideas to make it quicker...

I would love to hear for the next time i make one! Enjoy!!


my ingredients:
needle, thread and knowledge of a blanket stitch
two curtain sample material offcuts (fairly regular item at most opshops)
one old curtain (used due to green colour)
round metal hanging thing
stuffing from old pillow
wool


measure and cut two
pieces of material depe
ndant on how tall you want your trunk.

mine is 29 x 23 cm

place them inside out and stitch together leaving a hands width free at one end

i used a blanket stitch


turn inside out

and stuff


sew through both sides back and forth at desired intervals

i used 10 cm


the night i made the base of tree or top of the trunk, brit was jamming with her mate in the lounge so before i knew it i was finished and i hadn't photographed a thing... whoops

anywho i cut a circle 23 centimeters across
sew inside out but leave half open
turn right side out
insert two cut out cardboard circles
stuff and close gap


now i actually didn't measure this part however they are around 26 x 10 cm

and there are 7.5 of them

sew inside out leaving the bottom unstitched

squash overnight.


sew the sides together


then stuff
then sew onto the base


take some time to ponder the following options
- attach trunk to tree
- standing or handing

i decided on unattached and hung with
finger-knitted wool


they like it all right!

Thursday, July 22, 2010

and here it is!!

Happy sewing and make sure your imagination is not limited by the words or pictures!!

I however am taking the weekend off crafty stuff and heading to the snow!

Be Well

Wednesday, July 21, 2010


Two more sock buddies made with the intent to give one to my soon to be created nephew!

Now to pick the Opera Singing Zebra or the Owl Angel (he has poorly developed wings).

I'm waiting for a massive email to arrive and once it has I shall upload instructions so you can make your own!

Be Well!

Tuesday, July 6, 2010

You are not going to believe how simple this was, once I figured out the key of refurnishing...

dont take off the old one!!

The chair gets more comfortable and you save alot of time and effort trying to remove the staples.

also make sure the new material doesn't cover where you screw it back on or your asking for trouble!

So in conclusion:
1. unscrew the seat and sit on material
(my op shop is selling material samples which are the perfect size for my seats!)
2. staple around the edges and trim excess material.
3. screw seat back on and enjoy!

Sunday, July 4, 2010

So you have an old pillow and the case is shot but just as your throwing it away you realise that theres a zip... and the pillow inside is perfect!

So you get two pieces of material, match it to the size of the old case or make one larger if you want a flap like mine. Sew inside out and reverse when complete. Cut some button holes, use thread to make sure the edges doesn't fray and add additional decorative buttons and voila!

I used material left over from ted's dreads and mother provided the buttons so this case was technically free! sweetness.

Friday, July 2, 2010


So it's been a couple of months, six in fact, since I first set eyes on three little alien magnets from Toy Story.

I spent a month after that in and out of all sorts of American stores looking for some and then upon arriving home, awaited for Toy Story 3 to come out in New Zealand and hoped that there would be magnets brought out here as well!

there weren't.

But you know what there were stickers..
and I have magnet strip.

So these are my very new, very cheap, Toy Story magnets!
Todays craft is updating the old, i mean why buy new gloves when you can add buttons to your old ones!!

They are actually colourful buttons... though you wouldn't think it from this picture! I might take a better one tomorrow but I probably wont.

I spent the morning following around my niece, proceeded to spend the afternoon following around my crazy friend and spent the evening in a theater mostly in darkness waiting for scene changes that didn't seem to change anything. However ones the scene commenced it was hard to stop laughing!

What is it with time, does 11:11 or 1:23 or 2:34 mean anything? cos I see it all the freaking time!?!

Be Well!

Sunday, June 27, 2010

a beginning is always an exciting time. everything is fresh


I hate waiting. Mainly for phonecalls or anything that I actually have to stop and wait for. Anything that makes my stomach eat itself with anxiety.
But heres something you can make while you wait!

This is what mine looked like!


Maybe you'll make one and maybe one day i'll see it. In the mean time, the wait is over and i'm heading to mini golf. Wish me luck and be well!!